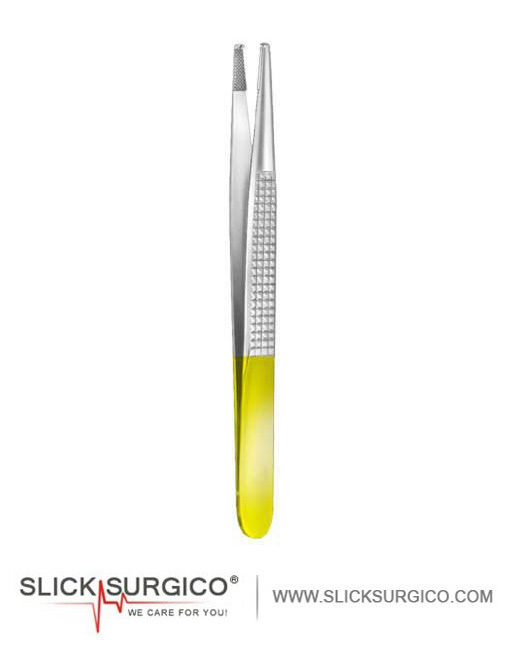
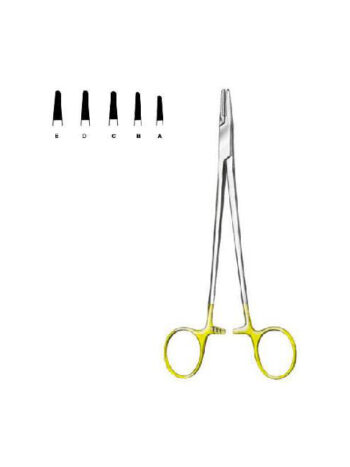
Tungsten Carbide Bonney Dissecting Forceps
Tungsten Carbide Bonney Dissecting Forceps provide excellent grip for even harder work. Professional design is very well appreciated by our customers all over the world.
- Brand Name: Slick Surgico / Your Brand Name (O.E.M)
- Lifetime Warranty: Peace of Mind
- Quality Workmanship: Surgical Efficiency
- Affordable Pricing: Value for Money
- Premium Service: Buy with Confidence
- Certification: ISO & CE Mark Certified Approved
- QC Passed: Yes
Description
Tungsten Carbide Bonney Dissecting Forceps Easy To Use Design made of stainless steel. Makes these tools truly professional and surgical grade allows you to sterilize these after every use.
- Hand Made Premium Tungsten Carbide Bonney Dissecting Forceps.
- Customized shape for comfortable and painless use.
- Stainless Steel Is used for High Quality and Durability.
- No Matter If You Are A Medically Professional skilled Or a Home User.
- Rust Free Lifetime warranty.
- Available in both, Mirror & Dull Finishing.
- Available in Half Gold Handle.
- Packed in Simple, Polly Bag Or Plastic Bag, but it can be changed if the customer requires.
Recommended Steps for Instruments Care Cleaning Sterilization & Maintenance
1) Hold in
It is important never to hold instruments in a dry container which allows blood and debris to dry onto instrument surfaces and makes cleaning more difficult.
If rinsing and decontamination processes are not immediately available pre-treat instruments or hold in a neutral holding or presoak enzymatic solution after patient use but before actual cleaning.
Prep Enzyme Foaming spray for pre-cleaning of soiled instruments and scopes simply spray on instruments until ready for rinsing and disinfection. Also use neutral pH all-purpose multi-enzyme concentrate is ideal for instrument presoaking and pre-cleaning s soon as possible, rinse, disinfect and clean as follows.
2) Rinsing
Immediately after surgery, remove organic materials by rinsing instruments under warm (not hot) running water. Rinse should remove most blood fluids and tissue. Do not process metals (stainless, copper, chrome plated, etc) together always wear safety protection gear.
3) Disinfecting
To protect medical personnel from contamination during cleaning, immerse instruments completely in an EPA approved disinfectant for approximately 10-20 minutes. Always closely follow manufacturers recommended disinfecting time and solution preparation and instruction then rinse again.
4) Cleaning
All blood dried body fluids and should be completely removed from the instruments prior to sterilization several methods are available.
- Soak: An enzymatic cleaner bath (soak) or a solution of water and neutral pH (7) detergent are effective in removing organic material from instruments. Use distilled (demineralized) water if possible instruments should be fully submerged for at least 10 minutes. Do not let “sharp” (scissors, knives, osteotomes, etc) running water to remove the solution change solutions frequently.
- Ultrasonic Cleaning: Most instruments manufacturers recommend ultrasonic cleaning as the most effective way to clean surgical instruments, particularly those with hinges, box locks, and other moving parts all instruments must be fully submerged in open position use distilled (demineralized) water if possible make sure that “sharp” blades do not touch other instruments to prevent possible surface scratching and also be sure dissimilar metal instruments are separated. Process instruments for the full recommended ultrasonic cleaning cycle. Change solution frequently or as often as the manufacturers recommend rinse instruments with water to remove the cleaning solution can be safely used with all ultrasonic units.
- Automatic Washer sterilizer: follow manufacturers recommendations but ensure instruments are lubricated after the last rinse cycle and before the sterilization cycle.
5) CAUTION
- Needle holder and forceps may check if sterilized with a ratchet in the closed position Manual cleaning if ultrasonic cleaning is not available, observe the following steps.
- Use stiff nylon cleaning brushes do not use steel wool or wire brushes except specially recommended stainless steel wire brushes for instruments serrated areas, bone or on stained areas of knurled handles.
- Use only neutral pH (7) detergents such If not rinsed off properly, low pH (acidic less than 6 pH) detergents break down the stainless protective surface resulting in pitting and or back staining.
High pH detergents (alkaline more than 8 pH) which can also interfere with the smooth operation of instruments most brown stains do not rust and are easily removed with stain remover. - Brush delicate instruments carefully, and if possible separate them from general instruments.
- Make sure instruments surfaces are visibly clean and free from stain and tissue stain Remover can help remove residue stains this is also a good time to inspect each instrument for proper function and condition.
- Check scissors blades to ensure proper function blades should glide open and closed smoothly test cutting performance at length of the blade with the following recommended materials scissors should cut all the tips.
6) Recommended Cutting Test Materials
- Fine or Delicate scissors surgical gloves.
- Medium scissors Single layer of stocking or cast netting.
- Large or utility scissors Double layer of stocking or cast netting.
- Check forceps (pickups) for proper jaw alignment teeth must meet properly without catching.
- Check hemostats and needle holders to ensure jaw tips close in first ratchet position and entire jaw should close in third ratchet position check instruments for loose hinges and verify that they lock and unlock easily.
- The suction tube should be clean inside.
- Test Biopsy Punches by punching a clean hole in 3-6 mil thick poly-bag material if poly-bag material is not available to use tissue paper.
- Retractors should function properly.
- Cutting edge instruments and knives should be sharp and free of damage.
- After scrubbing rinse instruments thoroughly under running water while rinsing, open & close scissors, hemostats, needle holder & other hinged instruments to make sure the hinge areas are rinsed out and no debris remains.
7) After Cleaning
Separate dissimilar metals prior to sterilizing/Autoclaving if instruments are to be stored let them air-dry & store them in a clean and dry environment.
8) Autoclaving
Lubricate all hinged instruments which have any “metal to metal” action, at the screw or box lock.
A non-silicone water-soluble surgical lubricant is recommended do not use industrial oils and lubricants sterilizer instruments either individually or in sets.
Individual Instruments
Disposable paper or plastic pouches are ideal to make sure to use a wide enough pouch for instruments with ratchet locks so instruments can be sterilized in an open (unlocked) position instruments locked during autoclaving can experience cracked hinges (box lock) or other problems because of heat expansion. If wrapping instruments, make sure the towel does not contain detergent residue, which can stain instruments.
Instruments Sets
Unlock all instruments & sterilize in an open position place heavy instruments on the bottom of sets when two layers are required do not overload the chamber because an air pocket may form that hinders steam penetration.
9) CAUTION
With most portable tabletop autoclaves, at the end of the autoclave cycle and before the drying cycle, unlock the door and open it no more than crack, about” (6.4mm). Then run the dry cycle for the period recommended by the autoclave manufacturer.
If the autoclave door is fully opened before the drying cycle, cold room air will rush into, the chamber causing condensation on the instruments that may result in water stains or cause wet packs to make sure autoclave filters and chambers are cleaned as recommended by the manufacturer.
Stain Remover is effective in removing stains and cleaning the autoclave chamber if you have any unusual staining on your instruments after sterilization obtain our instruments Care Instruction or contact to your local Slick Surgico’s representative.
10) Chemical or Cold Sterilization
Most chemicals / cold sterilization solution renders instruments sterile only after 10-hour immersion this prolonged chemical action can be more detrimental then the usual 20-minute autoclave cycle if the instruments need to be “disinfected” only a chemical or cold sterilization soak is acceptable as disinfection in using bleach (paragraph 3).
- Sterile an absolute term no living Organism survives.
- Disinfected basically cleans some organisms may survive.
Always use the proper sterilization/cleaning technique to render the instruments in the required condition for use.
Additional information
| Finishing | Mirror Finish, Satin (Dull Finish) |
|---|---|
| Size/Fig | Standard |
2 reviews for Tungsten Carbide Bonney Dissecting Forceps
You must be logged in to post a review.

Isaac (verified owner) –
Good quality.
Camden (verified owner) –
Very well worth the money.